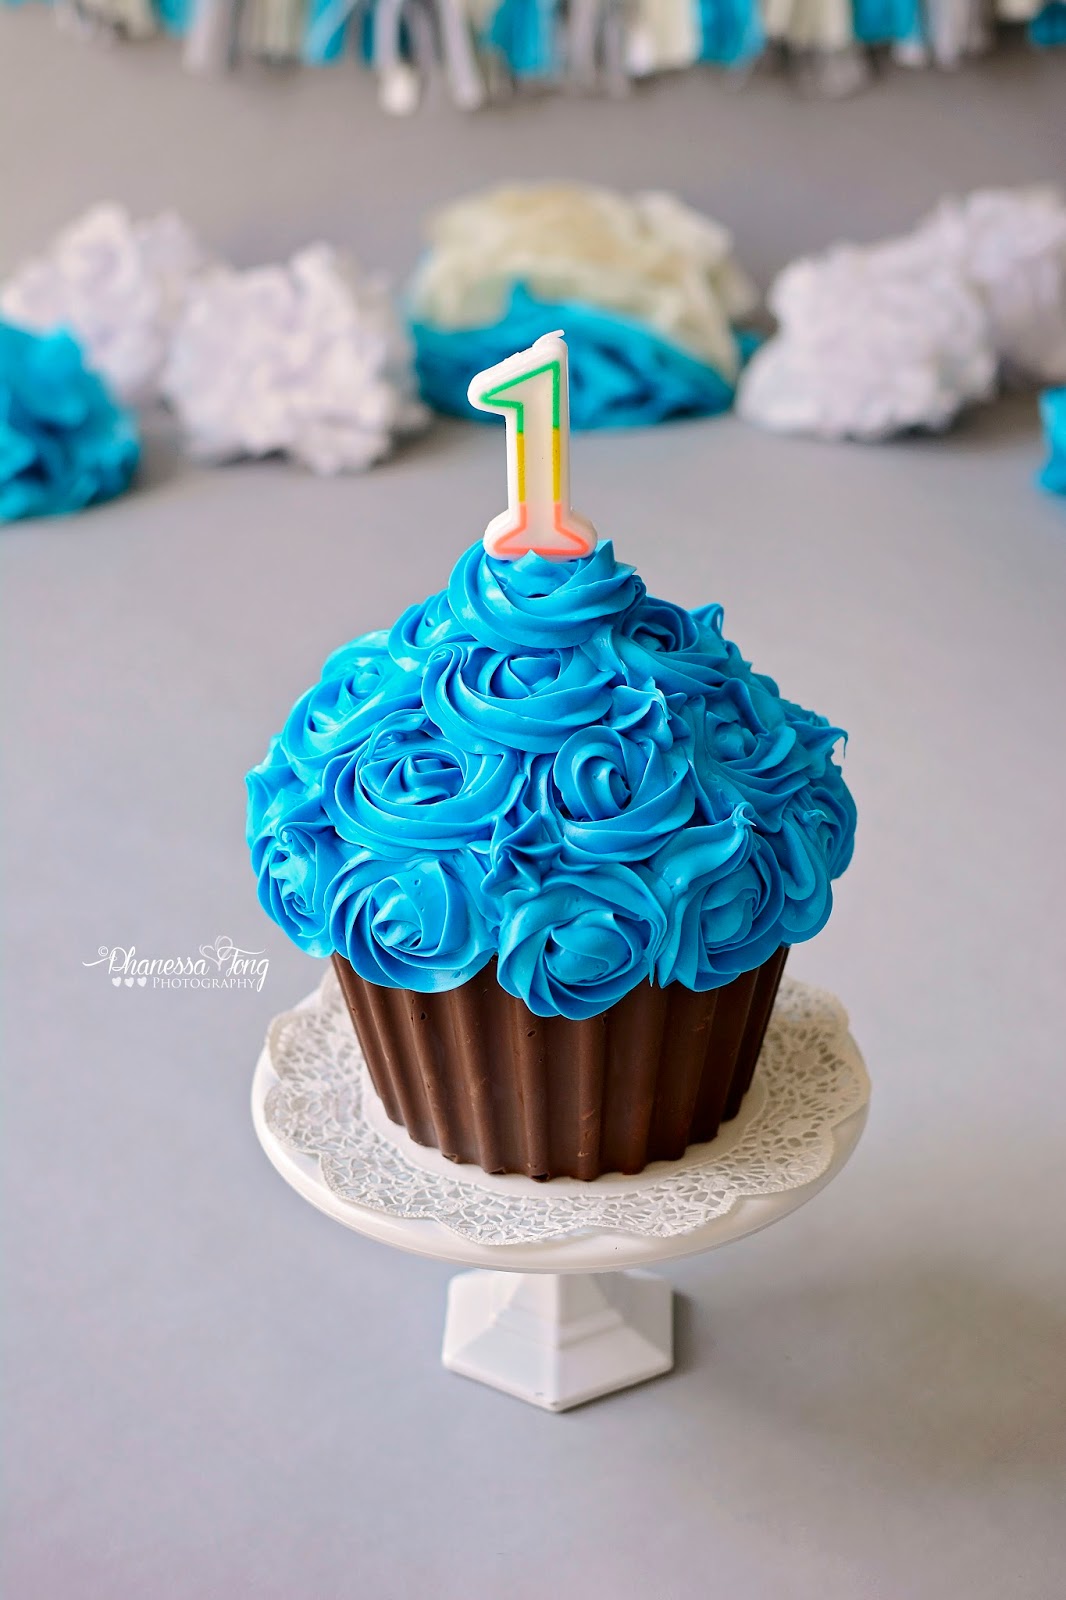
I started my cake smash sessions purchasing small cakes. There weren't a lot of choices and I often feel disappointed with them.... so I was on a mission to learn to do it myself! I absolutely LOVE the giant cupcakes. I still have a lot to learn and hopefully I get to the point where I can create all sort of different kinds of designs (some day!). For now, I'm
SUPPLIES:
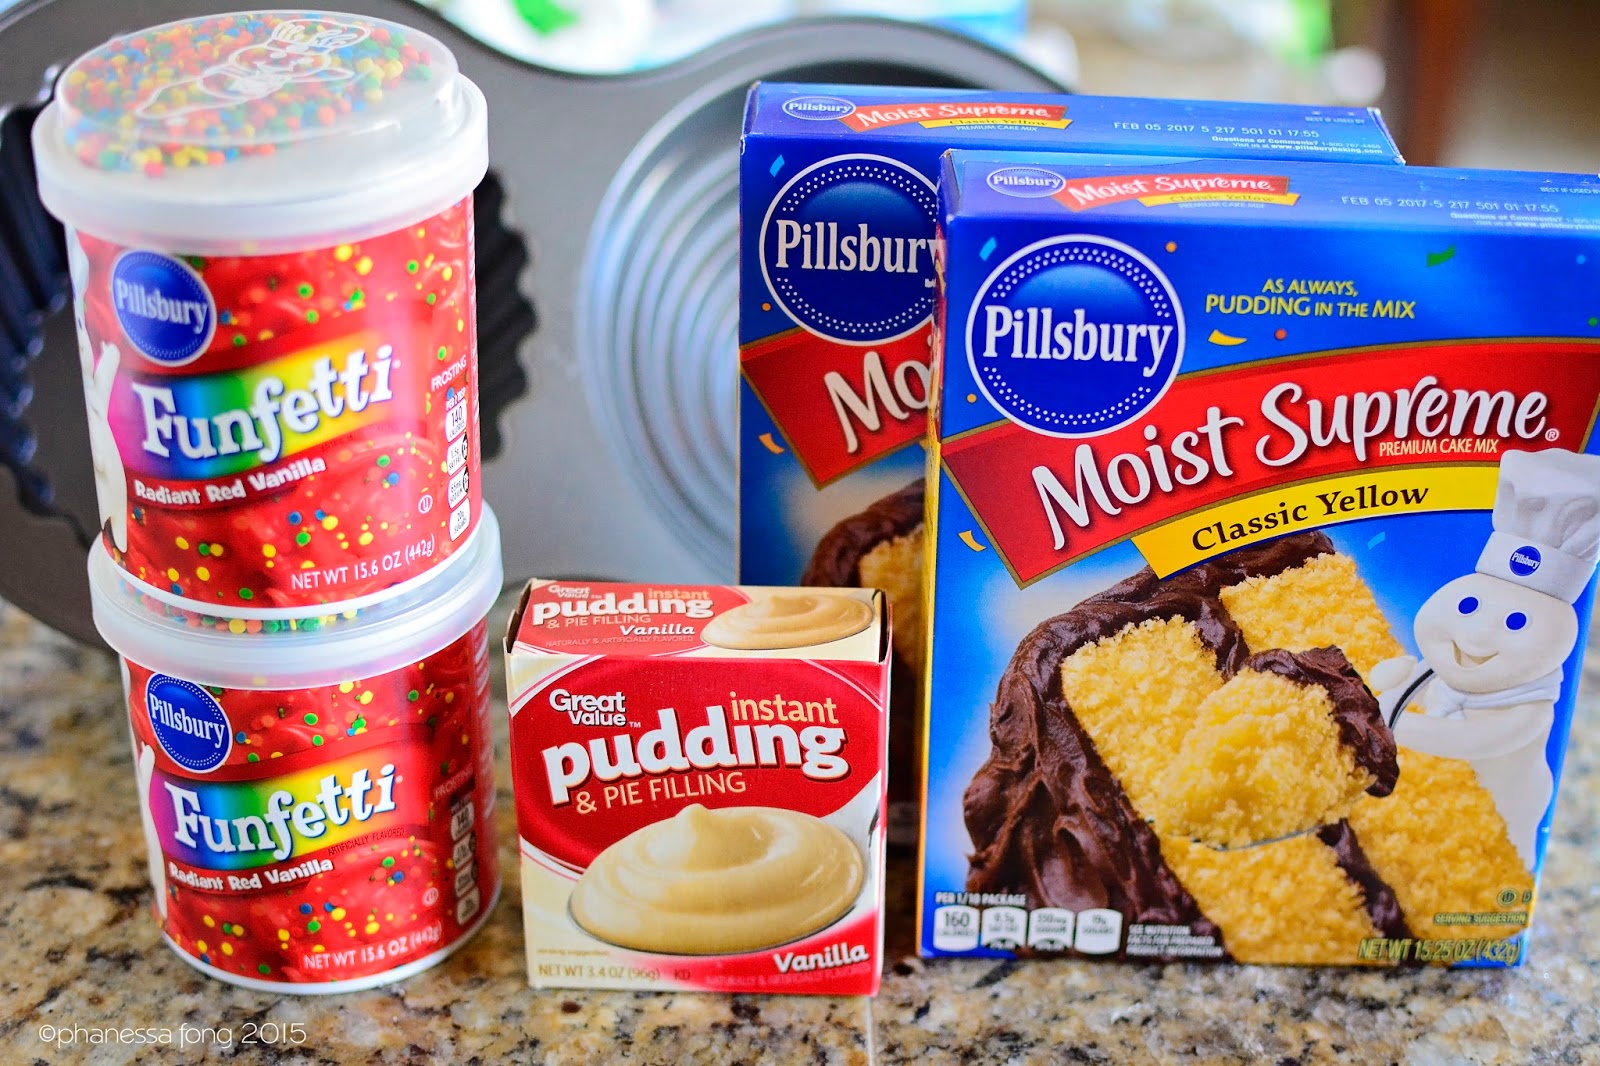
Cake
2 Boxes of Yellow Cake Mix
6 Eggs
1 Package Jello-O Vanilla Pudding Mix
1 Cup of Oil
2 Cups of Water
Giant Cupcake Pan/Mold

Frosting
2 Cans of Frosting (color of your choice)
Chocolate Cupcake Liner
1 lb Candy Melts (I use a little less than 1 pound.)
Microwavable bowl

DIRECTIONS:
CAKE:
1) Preheat oven at 325°. Combine cake mix, oil, water , pudding mix & eggs into a large bowl and blend.


3) Bake for 60 minutes, turning the pan once halfway (at 30 minutes). It always comes out a little too done in my oven so I bake it at 50-55 minutes. I guess it depends on your oven.

4) Let cool in pan for 15 minutes before removing onto a wire rack for cooling.

5) Once cooled completely, slice off the raised parts of the cake to level it. Do it for both the pieces. If you are using a cupcake liner, trim off the sides of the bottom piece too. Trimming just the "bumpy" parts works for me. This will allow the cake to fit into the liner.

CHOCOLATE LINER:
1) In a microwaveable bowl, place the candy melts into the bowl (I used a glass measuring cup).


3) Spread the chocolate on the bottom portion of the cake pan & up the sides. Just try to spread it as evenly as possible.

4) Refrigerate for at least 40 minutes. This is important. I tried taking it out after 15 minutes the first time and cracked the liner. I was so worried this wasn't going to work. All it took was some time and patience. :) You may be able to stick it in the freezer but I don't have room in my freezer! haha
5) Remove from the refrigerator and turn it upside and and gently tap the pan. It will slide right out (I promise!).
6) Place the bottom part of the cake in the liner.
FROSTING:
1) Dump the cans of frosting into a bowl and use a hand mixer to blend it.
2) Apply some frosting to the top of the bottom portion of the cake (that should already be in the chocolate liner) and place the cone part on top. The frosting is your "glue".
2) Using a piping bag and a 1M piping tip (for rosettes), pipe Rosettes all around the top portion of the cake (starting at the bottom). I find that piping it lower looks better. Piping each rosette in between the bottom two makes for a prettier design.

The canned frosting was droopy and looked like it was melting but refrigerating it overnight made a difference. The first time I made it, I thought I was going to have to run to the store the next morning!
3) Decorate or top with a candle.


