Thursday, October 23, 2014

DIY Candy Corn Costume

I wanted to make something easy for my boys. I found this on So You Think You're Crafty. Looks easy enough. At least that's what I thought! I didn't buy the felt by the yard. I figured the rectangle craft pieces would be enough... it wasn't. At least not for my 4 year old.

If you are OCD like me, you might want to LOOK at a candy corn first. I followed the tutorial only to find out the colors orange and yellow are switched. It should be white, orange, then yellow. I realized this after I put on the crochet candy corn hat (which I crocheted while looking at an actual candy corn last year). I tried to look for more felt to redo it but it's October and all the craft stores were out of orange felt! So I left it alone... Plus, it's only a costume (trying to calm the OCD side of me). 

SUPPLIES:

Felt in white, orange & yellow
Scissors
Sewing Machine/Thread
Child's shirt/dress as a template


DIRECTIONS:

I sewed the 3 pieces together (white on top, Yellow then orange) like the candy corn. The orange should be in the middle. You need 2 pieces. 


Trace your child's clothing and pin. As you can see, these were too small for me to flare out the pieces like a dress.


I actually cut a slit in the back right up the middle so that it will fit better. I'll need bigger pieces for my 4 year old. This was big enough for a 20 month old.


For my 4 year old, I made it with 2 pieces of each color for the front AND back so I used a total of 4 pieces each color.  When I traced his shirt, I flared the bottom in order to make it easier to slip on. It looks like a dress but if you look at a candy corn, the bottom is wider too ;)


And here they are out on Halloween night! It was a little wet but at least not raining at that time! 


Friday, October 17, 2014

Sharpie Personalized Plate

I actually made this plate a couple of years ago for our 5th anniversary. I wanted to put it in my blog. There are lots of tutorials out there on how to make these but it's pretty simple. 

Write/Draw on your ceramic plate, cup...etc.
Bake at 350° for 30 minutes

SUPPLIES:

Plate - Found some plain ceramic plates at the Dollar Tree
Sharpie Pen(s) - I used a red & black pen


 DIRECTIONS:

Go wild. Get creative! I decided that I would write the lyrics of our Bride & Groom dance song Me and You by Kenny Chesney. I wrote Me and You in red so it stands out. 


I wanted to draw the same exact picture from our shot glass favor. I was surprised I didn't screw that up!


I baked it for 30 minutes at 350° 

Men are a little less sentimental about personalized gifts (well, at least my hubs seems that way) than women. If he gave this to me, I would have gotten teary eyed. I love him anyway :)

DIY Door Jammer


I made a few door jammers when my first son was born over 4 years ago. Being a first time mom, we tip toed around him all the time. I don't know if he was just a "hard" baby or what but he didn't sleep well. In fact, he didn't sleep through the night until he was 1.5 years old. Every time we slowly closed the door, he would still wake with the tiniest noise! UGH! Anyway, luckily my 2nd son was an "easy" baby and slept very well. There was no need for door jammers. In fact, I have already lost them.

Now that I'm not sleeping again with a new baby boy, I desperatly need door jammers. Why? Well, he sleeps okay but my oldest (sounds like a trouble maker?) always barges into the room and scares the crap out of me. My heart is racing and ready to jump out of my chest. What time is it? It's 2 in the morning... "Go back to bed honey, come back when it's light out. It's almost morning" Yeah right, but he doesn't know that! "Close the door gently please" and BAM!!! It's like he's doing it on purpose! Haha

This morning I was on a mission to make a few door jammers for all of our doors. It's not only my son who slams the door. My husband closes it very loudly too (we won't say slam since he's an adult). It was a quick project. Probably quicker if I didn't stop to take photos. hehe

SUPPLIES:
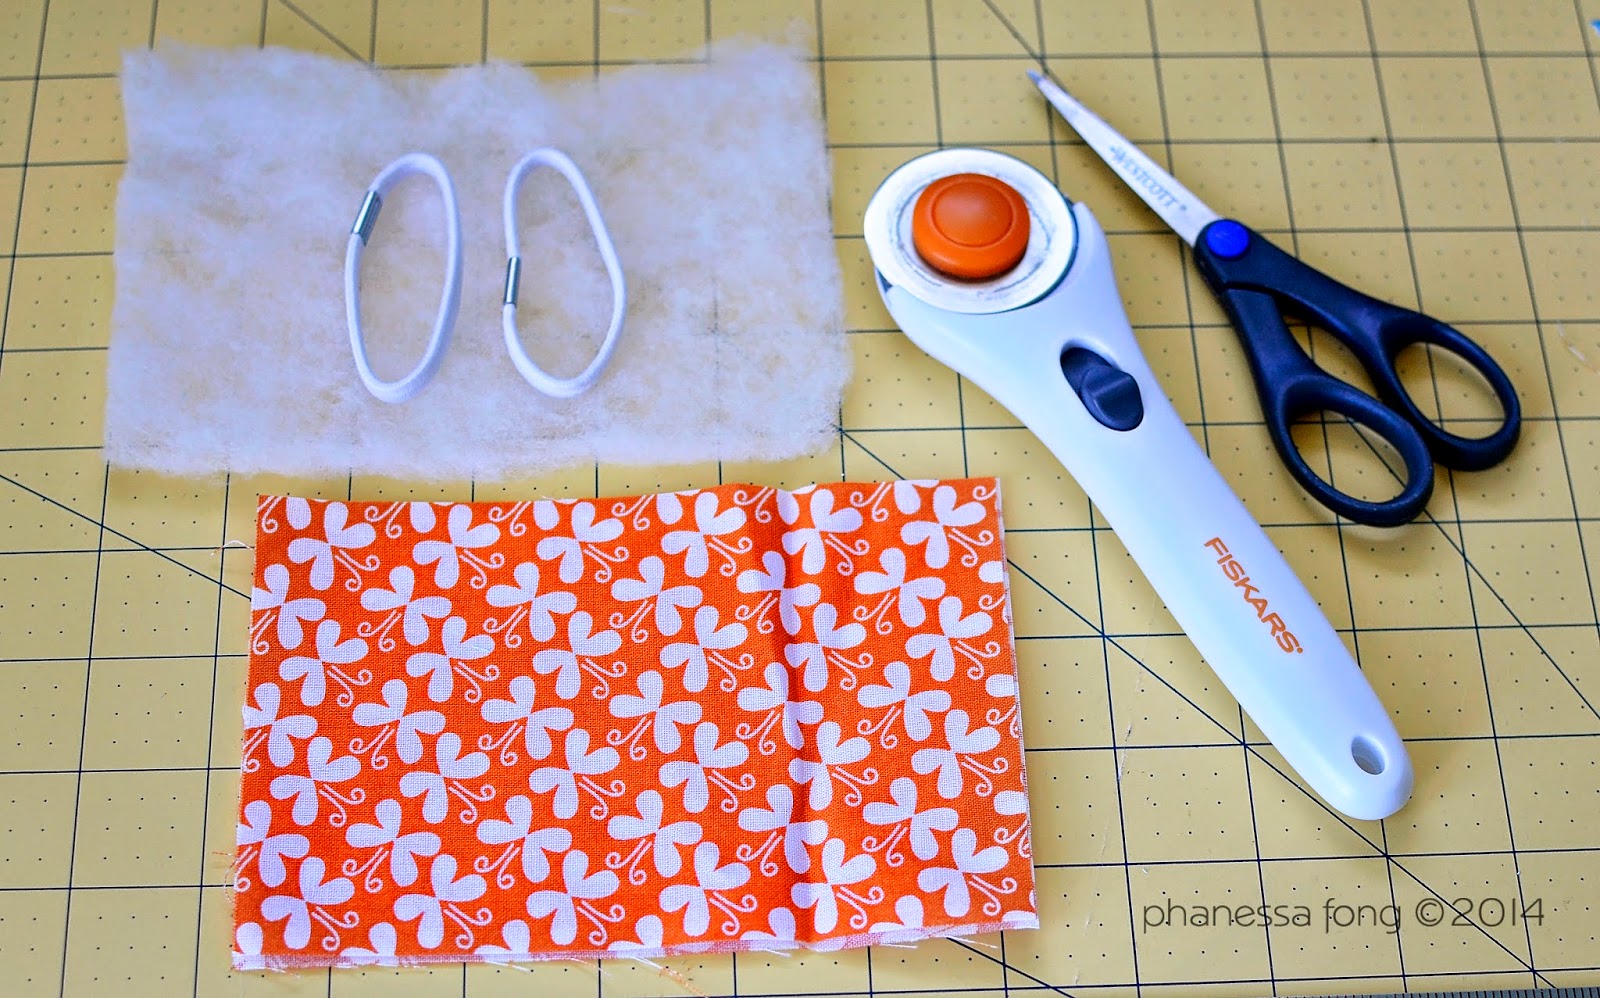
  • Fabric - 2 pieces cut into 4 x 5.5 inches
  • Batting - Same size 4 x 5.5 inches
  • Scissors/Rotary Cutter
  • Chopsticks/Stick - To push corners out
  • Elastic - I used hair bands
  • Pins
  • Sewing Machine/Thread


DIRECTIONS:

Place your 2 fabric pieces right side together with batting piece on bottom.

The batting will be on the bottom so it's easier to work with.
Place the elastic on the inside between the fabric. Pin the elastic in place.


When you turn it inside out, the elastic will be on the outside.

Pin around the fabric.
Leave space for turning inside out.
Sew around edges leaving a few inches to flip inside out.


I find that leaving the needle down makes it easier to turn corners.
Just enough space to turn inside out.
Cut off any batting or fabric from edges. Cut angles on all four corners.


Turn inside out and use chopstick/stick to push out corners.
Sew around edges to finish. 
Don't forget to back sew at the beginning and end to secure stitches.


I had to make one for all doors!


Wednesday, October 15, 2014

DIY Cloth Napkins

So I decided to make my kitchen blog look better. This means using my DSLR instead of my iPhone. When I started to stage my plate, I realized I have no pretty napkins or interesting utensils. I can't do anything about my utensils... Yet but I have plenty of scrap fabric for napkins!

SUPPLIES:

Fabric
Scissors/fabric cutter
Sewing machine
Thread
Chopstick or stick

I have a few Fat Quarters of fabric laying around & some other scrap fabrics. 

I don't really care what size the napkins are so I didn't measure exactly. I just cut straight lines so that I get a square or a rectangle. 

I decided to use the same fabric for both sides. 

DIRECTIONS:

Cut fabric to the size you want. 18x11 is what you'll get from a fat quarter piece if folded in half. 

Place fabric wrong side out. Sew along edges leaving a quarter inch allowance leaving 3-4 inches to flip inside out. 


Cut all four corners. 


Turn inside out with right side fabric outside. Use chopstick to push corners out. 


Sew the opening shut and along all edges. 

I had time to make 3... then the baby woke up :)