Wednesday, April 22, 2015

Upcycled Newborn Pants

I have a newborn session with a baby girl this weekend. I always try to make something new for each baby. I crocheted a few hats not sure what size would fit.

I also found a tutorial here (template included - yay!) for making newborn props out of sweaters. I've made a set of newborn props for my son's photos last year. I have a pink sweater that needs to be up-cycled so I decided to make a set. I only had time to make the newborn pants.

What you'll need:

Sweater
Scissors
Sewing Machine
Coordinating thread (which I didn't have!)
Yarn (drawstring)

Instructions:

So if you visit the site here, there's a free template you can print. I love people who share their talents and allows me inspiration and access to free tutorials. THANK YOU! ^_^

I was actually able to make one pants from one side of the sweater. I was disappointed when I finished but that was my own fault (you'll see why).


1) Cut out your sweater and fold


2) Fold sweater and pin template - Obviously, the side that says "fold" should be where the fabric is folded. Do this twice. You should have 2 pieces.


3) With the RIGHT side facing each other, pin the top side edges 


4) Sew those edges and trim excess fabric off.


5) Fold so the seam is now in front and back. Pin the inside leg edges and trim excess fabric.


6) Fold top down and pin. Sew around the waist.


7) I used a yarn needle to thread bulky yarn through. I thought maybe pretty lace would look cute but I couldn't find any.


So here is why I'm disappointed. When I thought I double checked to make sure my fabric was facing the right direction before my first sewing... I thought I was "good" so I never checked again as I'm too busy rushing and taking photos. When I finally finished, and stood back to look at it, I notice one side was different than the other side. This is why it's important you make SURE that BOTH sides of the RIGHT side of the sweater (fabric) is facing TOGETHER! UGH! Oh well. I will make this work. I am not taking it apart for sure! Lesson learned... kicking myself on the behind and maybe, just maybe, if I have time. I will make another since I only used one side of the sweater. I was hoping to use the other side as layering pieces.


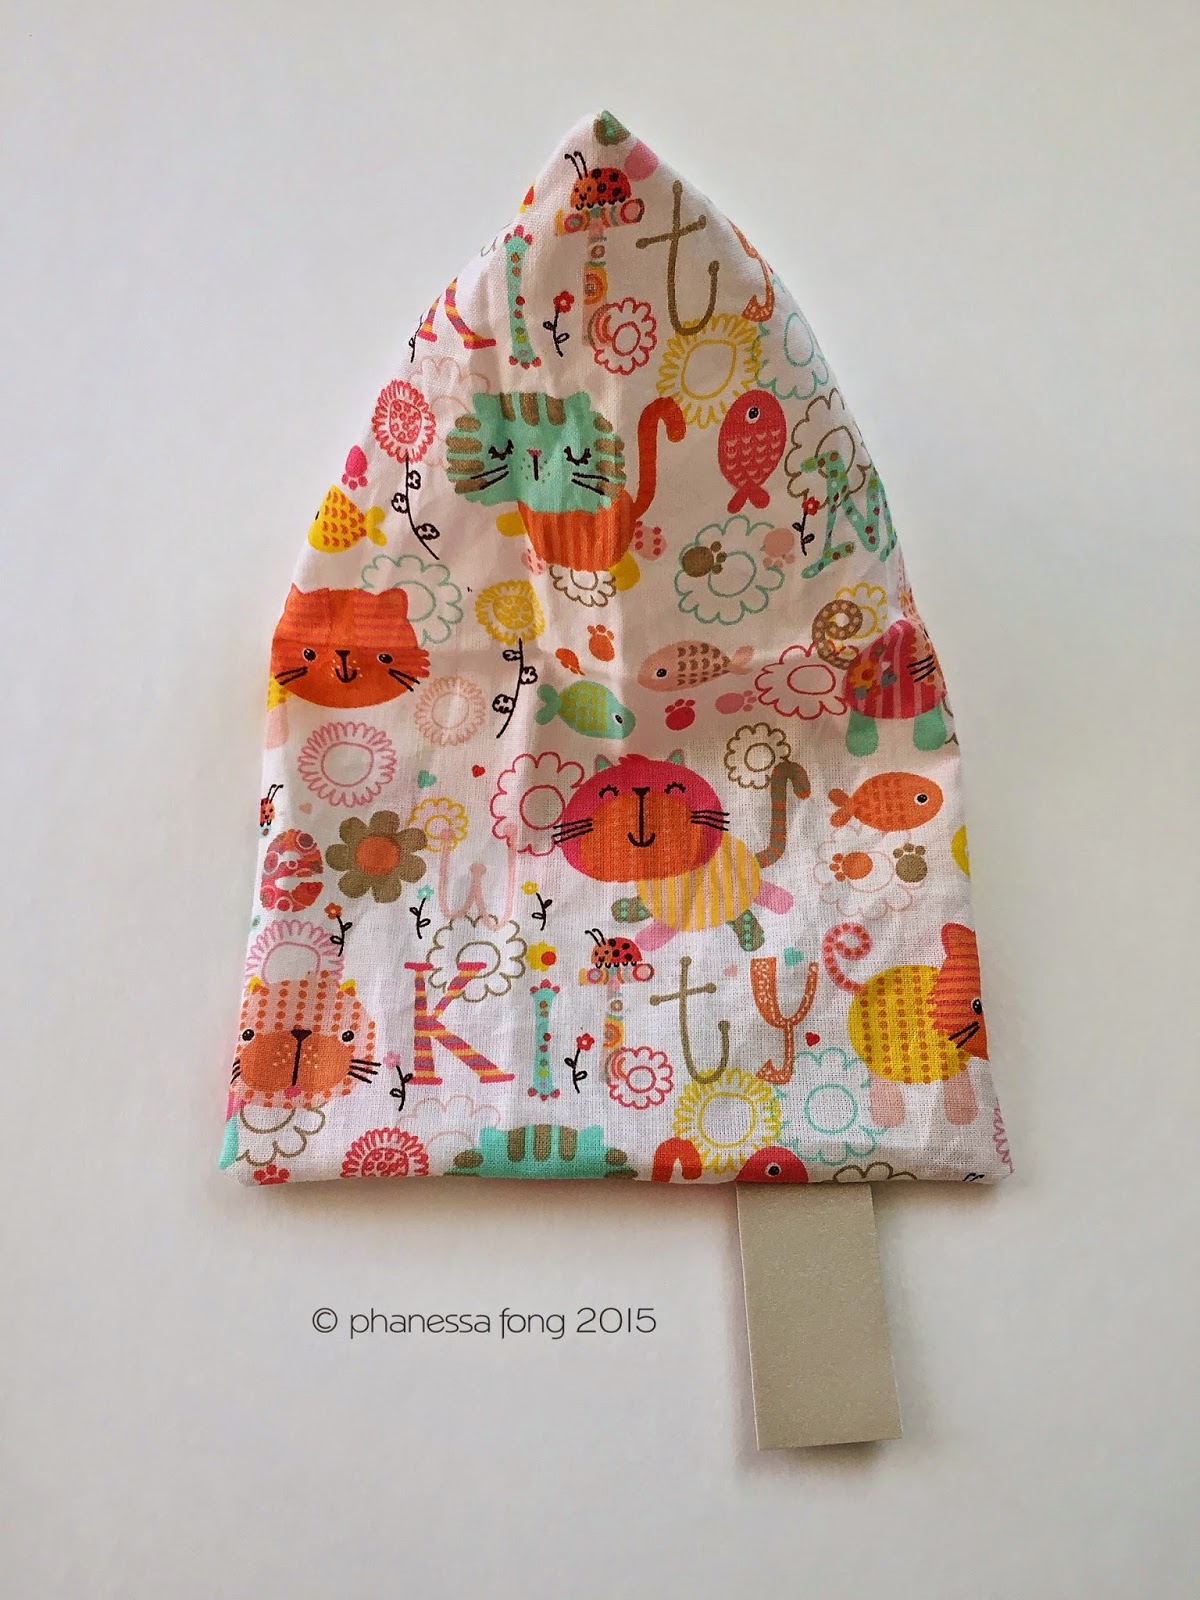
Click here to see the tutorial on the hat & tieback :)


Friday, April 17, 2015

Baby Giraffe Tag Toy


I wanted to make a giraffe toy for my baby. I have a lot of batting to use up. So I did a quick google search for a giraffe template. I really didn't like any I saw so I drew one myself. It was a lot harder than I thought! haha. This one was after I've given up after 3-4 failed ones.


Whatever. It wasn't going to be perfect anyway....

I also have lots of fat quarter pieces laying around. I love these because they're perfect for smaller projects like this!


SUPPLIES:

Fabric
Batting
Ribbons
Scissors
Sewing Machine and thread

DIRECTIONS:

I folded the fat quarter pieces into 4 layers (to make 2 giraffes) from each fat quarter.


Lay the template on and trace or pin to fabric. My craft room is a MAJOR mess so I couldn't find my fabric pen. So... I just pinned it and cut around it slightly bigger for seam allowance.


With the right side of the fabric together, pin ribbons in between the two pieces. The below photos are just to show you what it looks like inside because you'd want to pin them all together.


When you pin them all together, it'll look like this:


Sew around leaving space (about an inch) to flip inside out. I used a pencil to push all the corners out.


So I left the bottom portion open to stuff it with batting. After stuffing it, the opening was hand sewn shut (I hate doing this part) and it looked horrible. Oh well.


When I worked on the second giraffe, I left the front open and did a much better job (still bad though)!


Monday, April 13, 2015

DIY Tablet Stand


Do you get tired of holding your tablet or phone when you just want to set it down and be hands free? Who doesn't, right?! Recently, I had to find creative ways to stand up our Samsung tablet for the boys. I've tried leaning it against Kleenex boxes, napkins & anything I could find. The tablet was once in a case that had its own stand but since my 2 year old has been dropping it (okay, he's throwing it) I had to buy a heftier case. The only thing that worked was a rice pack I had laying around. I knew there's a tutorial somewhere to make one using rice! Of course, thanks to Pinterest, I found tons!

I didn't have much time (as usual) with a crying baby strapped to my back. I was bouncing around trying to soothe him so I figured I'd just use my iPhone to take photos. 

I'll have to make another and post revised instructions because I wasn't completely happy with the end results. It works great for the Samsung Tab 2 but not so great with my iPad Air. 

SUPPLIES:

12x9 Fabric (Fat quarters are perfect for little projects like this)
2-3 Cups Rice or Lentils or rice
Stuffing (I used batting from my Christmas "snow" photography set)
Extra Firm Pellon or what I used - Thick Scrapbook paper
Sewing Machine

Isn't this cute?


INSTRUCTIONS:

1) Fold the fabric with the wrong side in the outside. Press if you have time (I didn't). The fold will be on your left side.


2) Sew around the top and right side leaving a 1.5 inch gap on top left corner. Do not see the bottom. 


3) Open and flatten so the seam is now in the middle. 


4) Sew the bottom leaving a 1.5 inch opening on the right side. 


5) Turn it inside out so that the right side of the fabric is now on the outside. Use a chopstick (or pencil) to push out corners.


6) Measure up about 2 inches. I originally did 3 and I think it's too far up. Stick the Pellon or in my case, scrapbook paper folded in half for more thickness inside from the hole.


7) Pin in place. Sew around the strip to secure.


8) Stuff the front piece with batting. 


9) Hand sew the opening closed. I tried to run it through my machine but it wasn't happening! This is probably my least favorite thing to do because it took longer than I'd like. 


Isn't it cute how the word "Kitty" ended up right there?! I did not do this on purpose!


10) Fill the other portion with lentils or rice. I had rice in a ziplock bag and I just cut the corner. Here's what happened. A mess. I knew I would make a mess but I couldn't find my funnel!


Then I tried to MacGyver it and made a funnel with nearby scrapbook paper and a thumbtack. I still made a mess but it was better than before.


11) Stuff more batting before closing it up.


12) Hand sew hole shut (OMG, more hand sewing?!?)


Next time, I won't put the scrapbook paper piece so high up because it blocked my iPad and I don't think i need such a big piece.


It works well for the Samsung Tab 2